Ever tried trimming a branch, but your pole saw blade just won’t cut through? I’ve been there, and it’s frustrating. A dull blade makes every job harder, leaving rough edges and forcing you to use more effort. That’s why it’s important to learn how to sharpen a pole saw blade—it keeps your saw working smoothly and makes cutting effortless. Over the years, I’ve tried different sharpening techniques, from filing by hand to sharpening a pole saw chain, and I’ve figured out what works best. In this guide, I’ll walk you through easy, effective sharpening methods, share my personal experiences, and give you pro tips to keep your blade sharp for longer. Let’s get started—your pole saw will be cutting like new in no time!
My Personal Experience: How to Sharpen a Pole Saw Blade
I remember the first time I tried how to sharpen a pole saw blade. My saw was dull, and cutting took forever. I used more force, but that only made things worse. The blade left rough cuts, and I got tired fast.
At first, I made mistakes. I used the wrong file and sharpened at the wrong angle. My saw still didn’t cut well. Then, I learned the right way. I secured the blade with a clamp, used a flat file for straight blades and a round file for chain saws, and kept the angle at 30–35 degrees.
The difference was huge! After sharpening, my pole saw sliced through branches smoothly. I didn’t have to push hard anymore. Now, I sharpen every 3–5 uses to keep my saw in top shape. I also oil the blade after sharpening to prevent rust.
If you struggle with a dull saw, don’t wait. Learn how to sharpen a pole saw blade the right way. It saves time and effort, and your cuts will be clean and easy!
Tools You Need to Sharpen a Pole Saw Blade (What I Use & Recommend)
Ever tried sharpening a pole saw blade without the right tools? I did once—and let’s just say, I wasted a lot of time and effort. Having the right sharpening tools makes all the difference, and trust me, you don’t need fancy equipment. Whether you’re working with a straight pole saw blade, a chain-style saw, or a pruner blade, the right tools help you sharpen faster and keep your saw in top shape.
Here’s what I personally use and recommend for sharpening a pole saw blade the right way.
Essential Tools for Sharpening a Pole Saw Blade

If you’re sharpening by hand, these are must-haves:
Flat file – Best for straight pole saw blades; removes dull edges and reshapes teeth.
Round file – A must for chainsaw-style pole saws, like Stihl or Ryobi models.
Honing stone or diamond file – Perfect for quick touch-ups and finer sharpening.
Vice grip or clamp – Keeps the saw steady while you work—this makes sharpening easier and safer.
Lubricating oil – Prevents rust and keeps the blade running smoothly after sharpening.
Brush or cloth – Cleans off dirt, sawdust, and metal shavings before and after sharpening.
Protective gloves & safety glasses – Because metal filings in your eyes? Not fun.
The essential tools for sharpening a pole saw blade include a flat file, round file, honing stone, vice grip, lubricating oil, brush, and protective gear. These tools ensure a smooth, precise sharpening process.
Optional Tools for Faster Sharpening
Want to sharpen quickly with less effort? These tools can help:
Dremel tool with a sharpening attachment – Speeds up the sharpening process, especially for chains.
Chainsaw sharpening jig – Keeps angles consistent when sharpening a pole saw chain.
Electric grinder – Great for very dull blades, but be careful—too much grinding can over-sharpen and weaken the teeth.
Pro Tip: If you’re sharpening a chainsaw-style pole saw, a Dremel tool or chainsaw jig makes it way easier and faster than filing by hand.
What Tool Works Best for Your Pole Saw Blade?
Not all pole saw blades are the same, so picking the right tool matters.
- For manual pole saw blades (like Fiskars) → Use a flat file or honing stone.
- For chainsaw-style pole saws (like Stihl & Ryobi) → Use a round file or Dremel tool.
- For electric pole saws → A fine metal file works best.
- For pole pruner blades → Use a honing stone and finish with oil.
Use a flat file for straight blades, a round file for chain saws, and a honing stone for pruner blades. A Dremel tool or chainsaw jig can make sharpening faster and easier.
Why These Tools Matter (My Personal Experience)
I once tried sharpening my Stihl pole saw chain with just a basic file, thinking it would be enough. Big mistake! The sharpening took forever, and I couldn’t keep the angles even. After switching to a chainsaw sharpening jig, the process became faster, easier, and way more precise.
So, if you want to save time and effort, invest in the right tools—it makes sharpening simple and keeps your saw cutting like new.
Final Thoughts: Get the Right Tools, Sharpen Like a Pro
Sharpening your pole saw blade doesn’t have to be complicated—but using the right tools makes a huge difference. Whether you’re using a flat file, round file, or Dremel tool, having the proper setup means faster sharpening, better results, and a longer-lasting blade.
Now that you know which tools to use, let’s move on to how to actually sharpen your pole saw blade the right way.
How to Sharpen a Pole Saw Blade with a File (The Best Manual Method)
I’ll be honest—sharpening a pole saw blade with a file takes a bit of patience, but it’s totally worth it. I remember the first time I tried this method. I was frustrated with my dull saw, but after following a simple step-by-step process, the difference was like night and day. The saw glided through branches instead of struggling, and I didn’t have to use half as much effort!
If you want clean cuts and a saw that works effortlessly, this method is simple, effective, and doesn’t require fancy tools. Let’s dive into it.
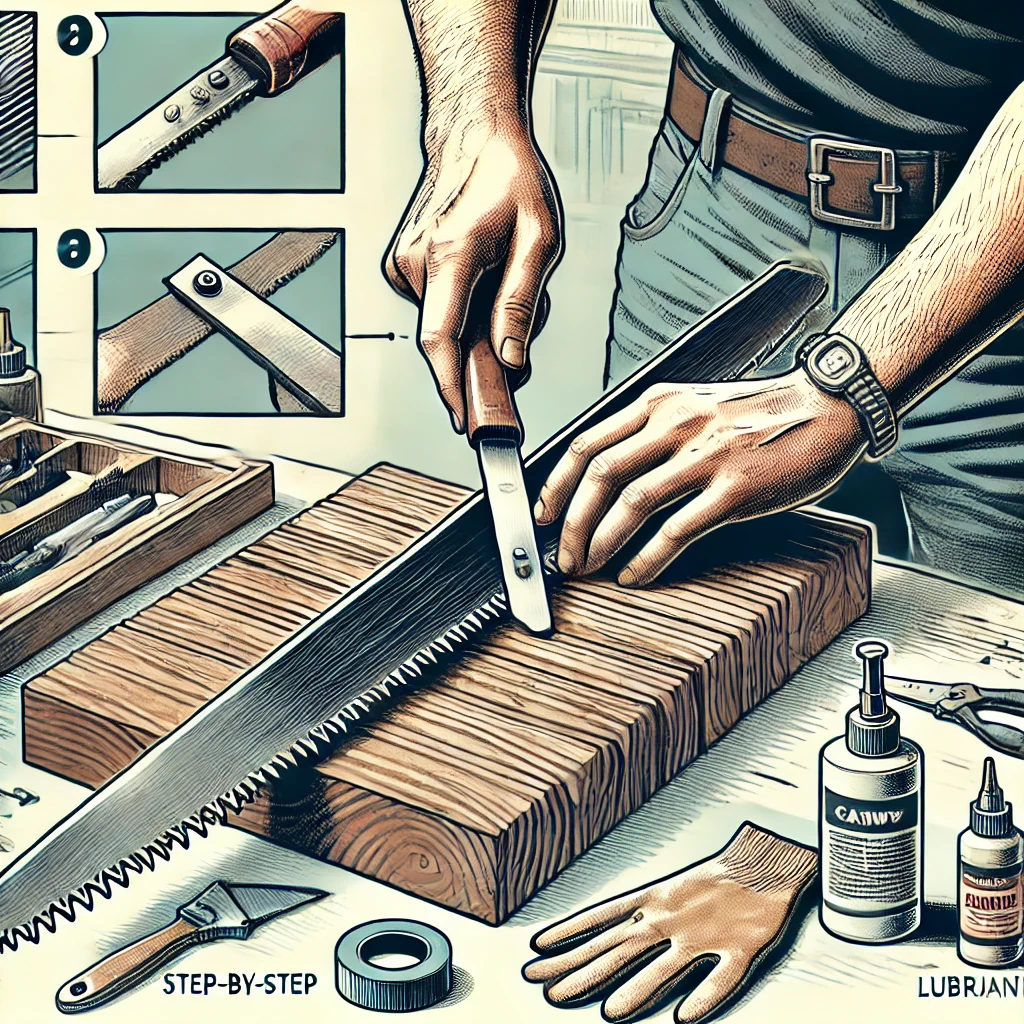
Step-by-Step Process for Sharpening a Pole Saw Blade with a File

Step 1: Secure the Saw Blade
Before you start filing, you need a stable setup. Trying to sharpen a moving saw blade is like trying to slice bread on a wobbly table—it just doesn’t work.
Use a vice grip or clamp to hold the blade securely.
If the blade is attached to the pole, rest it on a sturdy surface.
Quick Tip: If your saw is detachable, remove the blade—it’s easier to sharpen this way.
Step 2: Choose the Right File
Not all files work the same. Using the wrong one will either dull your blade further or make sharpening take forever.
Flat file – Best for straight pole saw blades.
Round file – If you’re sharpening a pole saw chain, you’ll need this instead.
Use a flat file for straight blades and a round file for chain-style pole saws for precise sharpening.
Step 3: File at the Correct Angle (30–35 Degrees)
One of the biggest mistakes I made early on was sharpening at the wrong angle—it left my blade uneven and useless. Most pole saw blades should be sharpened at a 30–35-degree angle for optimal cutting power.
Match the original angle of the teeth as closely as possible.
File in one direction only—don’t go back and forth!
Pro Tip: If you’re unsure of the angle, check your manufacturer’s guide or compare with a new blade.
Step 4: Use Smooth, Even Strokes
I used to think that pressing harder meant sharpening faster—big mistake! Too much pressure can damage the teeth. Instead, use:
Light, even strokes across each tooth.
About 5–10 strokes per tooth, depending on dullness.
Make sure each tooth gets the same number of strokes for even sharpness.
File each tooth evenly with smooth strokes at a consistent angle for the best sharpening results.
Step 5: Check Sharpness & Repeat if Needed
How do you know when your blade is sharp enough? Test it!
Gently run your finger along the edge (without applying pressure). A sharp blade should feel slightly rough.
Try cutting a small branch—a properly sharpened pole saw parts should slice through cleanly with minimal effort.
Pro Tip: If some areas still feel dull, repeat the process with a few more strokes.
Step 6: Apply Lubricating Oil to Prevent Rust
After all that effort, the last thing you want is your newly sharpened blade rusting away. A little maintenance goes a long way:
Wipe the blade clean to remove any metal shavings.
Apply a thin layer of lubricating oil to protect against moisture and rust.
Store your pole saw in a dry place when not in use.
Always oil your blade after sharpening to prevent rust and ensure smooth cutting.
Bonus Tip: Avoid Back-and-Forth Filing!
One mistake I made early on? Filing back and forth. This wears down the teeth unevenly and reduces cutting power. Instead, always:
File in one direction.
Use consistent, steady strokes.
Pro Tip: Mark the first tooth you sharpen with a marker to avoid sharpening the same tooth twice.
How to Sharpen a Tree Saw Blade (For Non-Chainsaw Style Saws)
I’ll be honest—if you use a tree saw often, you’ll need to sharpen it more frequently than a regular pole saw. I learned this the hard way when I tried trimming a thick branch with a dull saw. Instead of slicing through, it felt like I was hacking away forever, and the result? A jagged, uneven cut that took twice the effort.
Tree saws go through dense, tough wood, so keeping the blade sharp makes cutting easier, faster, and cleaner. Luckily, sharpening a tree saw blade isn’t complicated—you just need the right tools and technique.
Best Tools for Sharpening a Tree Saw Blade
Not all files work for tree saws. The key is to use a tool that matches the shape of the blade’s teeth:
Triangular file – Perfect for sharpening fine, precise teeth on curved saws.
Honing stone – Great for smoothing out nicks and refining edges.
Vice grip or clamp – Keeps the saw steady while sharpening.
Lubricating oil – Prevents rust and keeps the blade cutting smoothly.
Brush or cloth – Cleans off sawdust and metal shavings after sharpening.
Use a triangular file for sharpening and a honing stone for finishing to keep a tree saw blade in peak condition.
Step-by-Step Guide: How to Sharpen a Tree Saw Blade
Step 1: Secure the Saw Blade
Before you start, secure the saw blade so it doesn’t move around while sharpening.
If the saw is removable, clamp it down using a vice grip.
If it’s attached to a pole, rest it on a sturdy surface for stability.
Pro Tip: A wobbly saw blade leads to uneven sharpening, so make sure it’s held firmly in place.
Step 2: Identify the Teeth Pattern
Tree saw blades often have alternating bevel teeth—meaning every other tooth is angled differently.
To sharpen correctly, only file every other tooth on the first pass.
Once you finish one side, go back and sharpen the remaining teeth.
Sharpen every other tooth first, then return to the ones you skipped for even sharpening.
Step 3: File Each Tooth at the Right Angle
One mistake I made early on? Sharpening at random angles—this actually made my saw cut worse, not better.
Most tree saw blades are designed to be sharpened at a 20–25-degree angle.
Use a triangular file and apply smooth, even strokes—about 5–7 strokes per tooth.
Keep the pressure light—pushing too hard can grind down the teeth unevenly.
Pro Tip: If you’re unsure of the angle, check your manufacturer’s guide or match the original bevel of the teeth.
Step 4: Use a Honing Stone for a Smooth Finish
After filing, the blade might feel a little rough—this is where a honing stone comes in handy.
Run the honing stone lightly over the blade to smooth out burrs.
This step reduces friction and helps the blade cut through wood effortlessly.
Use a honing stone after sharpening to remove burrs and ensure smoother, cleaner cuts.
Step 5: Clean & Oil the Blade
A freshly sharpened saw blade needs proper care to keep it in top shape.
Wipe down the blade with a dry cloth to remove metal shavings.
Apply a thin layer of lubricating oil to prevent rust.
Store the saw in a dry place—moisture will dull the blade faster.
Pro Tip: Avoid storing your saw outside—humidity and rain speed up rusting and dull the blade.
Common Mistakes to Avoid When Sharpening a Tree Saw Blade
Sharpening every tooth at once – Always sharpen every other tooth first to maintain the correct angle.
Using too much force – Light, even strokes are better than grinding down the teeth too aggressively.
Skipping the honing step – A rough edge means more friction, making cutting harder.
Avoid over-filing, sharpening every tooth at once, and skipping the honing step for a properly sharpened tree saw blade.
Final Thoughts: Sharpening a Tree Saw Blade the Right Way
Sharpening a tree saw blade takes a little time, but the payoff is worth it. I used to think my saw needed replacing when it got dull—turns out, all it needed was a quick sharpening session! Now, I keep a triangular file and honing stone handy, and my saw cuts like new every time.
If your tree saw is struggling through branches, don’t toss it—sharpen it instead! A few minutes of sharpening can save hours of effort when cutting through tough wood.
Now that you know how to sharpen a tree saw blade, let’s move on to how to sharpen a Fiskars pole saw blade and other specialty saws.
How to Sharpen a Fiskars Pole Saw Blade (My Experience with This Brand)
Fiskars makes some of the best pole saw blades I’ve used. Their high-carbon steel stays sharp longer, but when it dulls, you need to sharpen carefully. I learned this the hard way—over-filing made my blade weak, and I had to replace it.
To keep your Fiskars pole saw blade sharp, you need the right tools and the correct technique. Follow this step-by-step guide to get clean, effortless cuts again.
Best Tools for Sharpening a Fiskars Pole Saw Blade
Fine-toothed file – Perfect for precise sharpening without thinning the teeth.
Honing stone – Smooths out rough edges for a cleaner cut.
Vice grip or clamp – Keeps the blade steady while sharpening.
Lubricating oil – Prevents rust and friction.
Brush or cloth – Wipes off metal shavings.
Use a fine-toothed file and honing stone to sharpen a Fiskars pole saw blade for best results.
Step-by-Step Guide: How to Sharpen a Fiskars Pole Saw Blade

Step 1: Secure the Blade
A moving blade is hard to sharpen. Secure it for better control.
Remove the blade if possible.
Clamp it in a vice grip or rest it on a solid surface.
Pro Tip: A wobbly blade leads to uneven sharpening.
Step 2: Use a Fine-Toothed File
Fiskars blades are sharper than most, so you need a precise file.
File each tooth individually in smooth strokes.
Keep the angle between 25–30 degrees.
Use light pressure—pressing too hard wears the teeth down fast.
Sharpen each tooth at a 25–30-degree angle using a fine-toothed file.
Step 3: Be Gentle with Pruner Teeth
If your Fiskars pole saw has a pruner blade, be extra careful.
Use light strokes to avoid removing too much metal.
Keep the cutting edge sharp without making it too thin.
Pro Tip: If the pruner teeth are too worn down, it’s better to replace them.
Step 4: Use a Honing Stone for a Smooth Finish
After filing, the blade might feel rough. A honing stone helps.
Run it lightly over the sharpened edges.
This removes burrs and makes cutting effortless.
A honing stone smooths burrs and gives cleaner cuts.
Step 5: Clean and Oil the Blade
A sharp blade needs protection to stay sharp longer.
Wipe the blade with a dry cloth to remove dust.
Apply a thin coat of oil to prevent rust.
Store in a dry place.
Pro Tip: Moisture dulls Fiskars blades fast—always store them inside.
Common Mistakes to Avoid When Sharpening a Fiskars Pole Saw Blade
Filing too hard – Removes too much metal, making the blade weak.
Sharpening at the wrong angle – Fiskars blades need a precise 25–30-degree angle.
Skipping the honing stone – This leaves rough edges, making cutting harder.
Avoid excessive filing, incorrect angles, and skipping honing to keep a Fiskars pole saw blade sharp.
Final Thoughts: Keep Your Fiskars Pole Saw Blade Sharp the Right Way
Sharpening a Fiskars pole saw blade takes a little effort, but it’s worth it. A sharp blade saves time and energy, making pruning easier. I used to struggle with dull blades, but now, with the right tools and technique, my Fiskars blade stays sharp longer.
If you want smooth, effortless cuts, make sharpening part of your routine maintenance. Now, let’s move on to sharpening a pole saw chain for chainsaw-style pole saws.
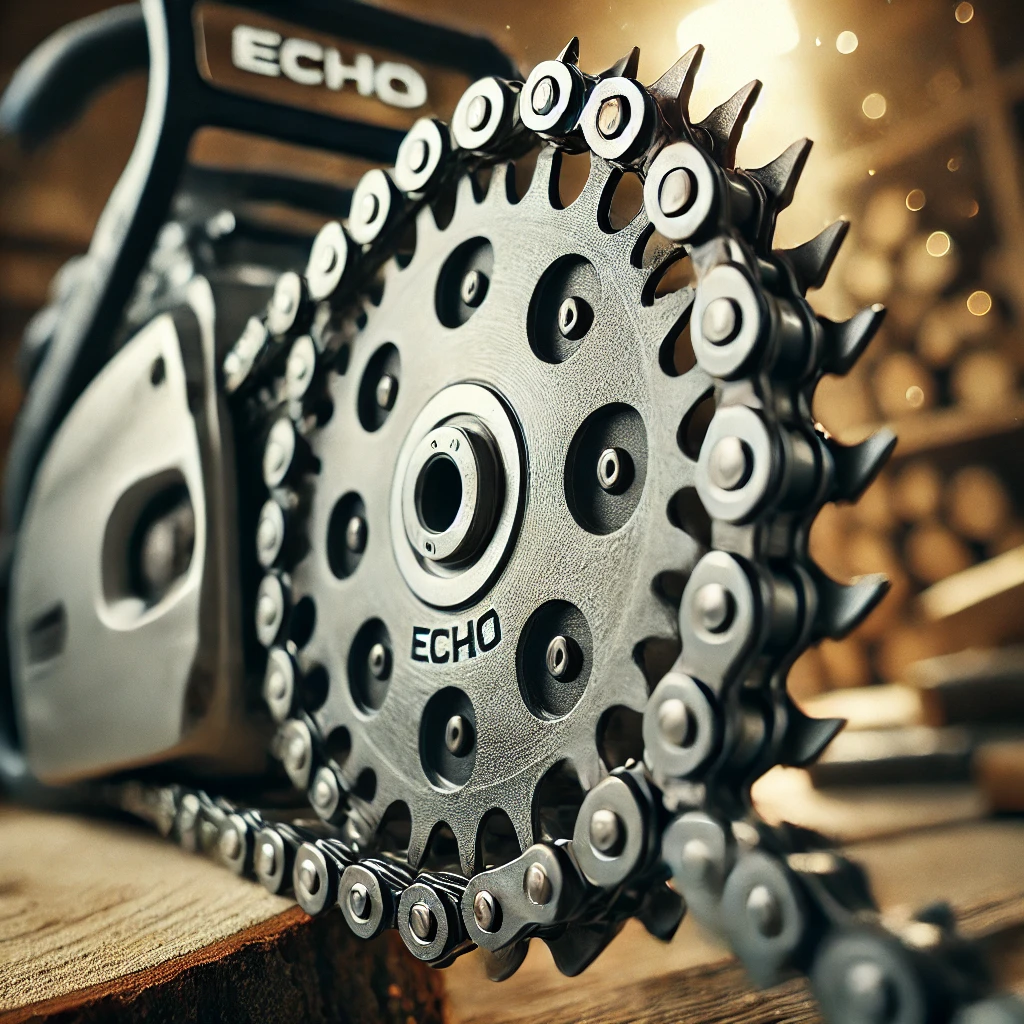
How to Sharpen a Pole Saw Chain (For Chainsaw-Style Pole Saws)
A chainsaw-style pole saw is a powerful tool, but when the chain gets dull, cutting turns into a struggle. I’ve been there—pushing harder, only to get smoky, uneven cuts. That’s when I realized a sharp chain does the work for you.
If you’re using a Stihl, Ryobi, or any chainsaw-style pole saw, regular sharpening keeps your saw fast, smooth, and efficient. Here’s the best way to sharpen a pole saw chain.
Best Tools for Sharpening a Pole Saw Chain
Round file (5/32-inch for Ryobi, 3/16-inch for Stihl) – Matches the chain’s cutting teeth.
Chainsaw file guide or sharpening jig – Keeps the filing angle precise.
Dremel tool with sharpening attachment – Speeds up the process.
Vice grip or guide bar clamp – Holds the saw in place.
Lubricating oil – Protects the chain after sharpening.
Gloves & safety glasses – Prevents injuries from metal shavings.
Use a round file and sharpening jig to maintain a chainsaw-style pole saw at the correct angle.
Step-by-Step Guide: How to Sharpen a Pole Saw Chain
Step 1: Secure the Chain for Stability
A moving chain is impossible to sharpen properly. Secure it first.
Place the saw on a flat surface and engage the chain brake.
If possible, use a clamp to hold the guide bar in place.
Pro Tip: A steady chain gives consistent sharpening results.
Step 2: Identify the Right File Size & Angle
Different pole saw chains require specific file sizes and sharpening angles.
Ryobi pole saw chains → 5/32-inch round file, sharpen at 30 degrees.
Stihl pole saw chains → 3/16-inch round file, sharpen at 30 degrees.
For other brands, check the manual for correct angles and file size.
Most pole saw chains sharpen at a 30-degree angle with a round file.
Step 3: File Each Cutter Tooth Evenly
Sharpening a chain requires precision. Uneven filing leads to rough cuts.
Position the file in the cutter’s gullet at a 30-degree angle.
File in one direction only—don’t go back and forth.
Use 5–7 smooth strokes per tooth.
Pro Tip: Sharpen every other cutter first, then go back to the ones you skipped.
Step 4: Check and Sharpen the Depth Gauges
The depth gauge (raker) controls how deep the chain teeth cut. If it’s too high, the saw won’t bite into the wood properly.
Use a depth gauge guide to check the height.
File it down slightly if it’s too high.
Keeping the depth gauge at the right height ensures smooth, controlled cuts.
Step 5: Rotate & Repeat on the Other Side
A chainsaw-style pole saw has teeth on both sides of the chain.
Rotate the saw or change your position.
Sharpen the remaining cutters using the same angle and strokes.
Pro Tip: Mark the first tooth you sharpen to avoid sharpening the same one twice.
Step 6: Lubricate and Test the Chain
A freshly sharpened chain needs oil to protect it from wear and rust.
Wipe the chain clean to remove filings.
Apply chain oil to keep it smooth and rust-free.
Do a test cut on a branch—if it cuts cleanly without forcing, it’s ready!
Always oil the chain after sharpening to prevent wear and rust.
Common Mistakes to Avoid When Sharpening a Pole Saw Chain
Using the wrong file size – Leads to poor sharpening and uneven cuts.
Filing at the wrong angle – A 30-degree angle is standard for most chains.
Skipping the depth gauges – This affects how well the chain bites into wood.
Over-sharpening – Removes too much metal and shortens chain life.
Avoid wrong file sizes, bad angles, and neglecting depth gauges to keep your pole saw chain sharp.
Final Thoughts: Sharpen Your Pole Saw Chain Like a Pro
A sharp chainsaw-style pole saw makes cutting effortless. I used to struggle with a dull chain, thinking I needed a new one. Turns out, all it needed was proper sharpening.
With the right tools and technique, you can sharpen your pole saw chain in minutes. Now, let’s move on to sharpening an electric pole saw blade for those using cordless or plug-in models.
How to Sharpen an Electric Pole Saw Blade (Quick & Easy Method)
Electric pole saws make trimming fast and effortless, but even the best blades dull over time. You might notice rough cuts, slower performance, or extra effort needed. That’s a sign it’s time to sharpen your blade.
Unlike chainsaw-style pole saws, electric pole saw blades need gentle sharpening to avoid over-thinning the cutting edge. I’ve tested different methods, and these are the easiest and most effective ways to get your blade cutting smoothly again.
Best Tools for Sharpening an Electric Pole Saw Blade
Fine metal file – Ideal for quick touch-ups and small dull spots.
Dremel tool with sharpening attachment – Speeds up the process and gives even sharpening.
Electric grinder – Use only if the blade is extremely dull (too much grinding can weaken it).
Vice grip or clamp – Holds the blade steady for safe sharpening.
Lubricating oil – Prevents rust and reduces friction after sharpening.
Brush or cloth – Cleans off dirt, sap, and metal filings before sharpening.
Use a fine metal file for touch-ups, a Dremel for faster sharpening, and an electric grinder only for very dull blades.
Step-by-Step Guide: How to Sharpen an Electric Pole Saw Blade

Step 1: Unplug & Secure the Blade
Before sharpening, safety first! You don’t want the saw accidentally turning on while working.
Unplug the pole saw or remove the battery if cordless.
If possible, remove the blade for easier sharpening.
Use a clamp or vice grip to hold the blade securely.
Pro Tip: A wobbly blade leads to uneven sharpening—always secure it properly.
Step 2: Clean the Blade
A dirty blade hides dull spots and makes sharpening less effective.
Use a brush or cloth to remove sawdust, sap, and dirt.
If there’s heavy buildup, scrub with warm soapy water or a mild degreaser.
Dry the blade completely before sharpening.
Always clean the blade before sharpening to remove sap and dirt buildup.
Step 3: Choose the Right Sharpening Method
Option 1: Fine Metal File (Best for Minor Sharpening)
Position the file at the original bevel angle of the blade.
Use light, even strokes in one direction only (never back and forth).
Apply 5–10 strokes per tooth, depending on dullness.
Option 2: Dremel Tool (Fastest Method)
Attach a sharpening stone or grinding wheel to the Dremel.
Set it to low or medium speed (high speed can overheat the blade).
Lightly run the Dremel along each tooth at the correct angle.
Option 3: Electric Grinder (For Extremely Dull Blades Only)
Use short, gentle passes to avoid grinding away too much metal.
Keep the blade cool—dip it in water between passes if needed.
Don’t overdo it—too much grinding can weaken the blade.
Use a file for small touch-ups, a Dremel for quick sharpening, and a grinder only for very dull blades.
Step 4: Check the Sharpness
You don’t want to put the blade back on only to find it’s still dull.
Lightly run your finger along the edge (carefully!)—it should feel slightly rough but not jagged.
Try cutting a small branch—a sharp blade should slice smoothly with little effort.
Pro Tip: If the blade still struggles, repeat the sharpening process with a few more strokes.
Step 5: Apply Lubricating Oil & Reassemble
After sharpening, protect the blade so it stays sharp longer.
Wipe the blade clean to remove metal shavings.
Apply a thin coat of lubricating oil to prevent rust.
Reattach the blade and test it on a dry branch.
Quick Answer for AEO: Oil your blade after sharpening to prevent rust and keep it cutting smoothly.
Common Mistakes to Avoid When Sharpening an Electric Pole Saw Blade
Skipping the cleaning step – Dirt and sap clog the file or grinder, making sharpening harder.
Sharpening at the wrong angle – Follow the original blade bevel for best cutting performance.
Over-sharpening – Removing too much metal weakens the blade and shortens its lifespan.
Not securing the blade properly – Leads to uneven sharpening and potential injury.
Avoid over-filing, incorrect angles, and skipping lubrication to keep your electric pole saw blade sharp.
Final Thoughts: Keep Your Electric Pole Saw Blade Sharp & Efficient
Electric pole saws make trimming easy, but a dull blade turns cutting into a struggle. I used to force my saw through branches, thinking it needed more power—until I sharpened the blade properly.
With the right tools and a few minutes of maintenance, your electric pole saw will cut like new. Whether you file by hand, use a Dremel, or grind cautiously, sharpening is simple when done right.
Now that you know how to sharpen an electric pole saw blade, let’s move on to sharpening a pole tree pruner blade for clean, precise cuts.
How to Sharpen a Pole Tree Pruner Blade (For Clean, Smooth Cuts)
Ever tried pruning a branch, only to crush it instead of slicing cleanly? A dull pruner blade does more harm than good. Instead of a smooth cut, it tears and splinters the branch, making trees prone to disease. I learned this lesson after ruining my orange tree—instead of trimming, I left jagged cuts that took forever to heal.
The good news? Sharpening a pole tree pruner blade is quick and easy. Follow these steps to keep your pruner cutting cleanly and effortlessly.
Best Tools for Sharpening a Pole Tree Pruner Blade
Honing stone – Best for fine sharpening and refining the cutting edge.
Diamond file – Great for restoring very dull or nicked blades.
Vice grip or clamp – Holds the blade steady for safe, even sharpening.
Lubricating oil – Protects the blade from rust and friction.
Brush or cloth – Wipes away sap, dirt, and metal shavings.
Use a honing stone for touch-ups, a diamond file for very dull blades, and oil to prevent rust.
Step-by-Step Guide: How to Sharpen a Pole Tree Pruner Blade
Step 1: Secure the Blade
A wobbly blade makes sharpening difficult and uneven.
If the blade is removable, take it off.
If not, extend the pole saw and secure it against a stable surface.
Use a clamp or vice grip to hold the blade steady.
Pro Tip: A stable blade = a precise sharpening job.
Step 2: Clean the Blade
A dirty blade hides dull spots and clogs the sharpening tool.
Use a dry brush to remove sawdust and debris.
If sticky with sap, wipe it down with rubbing alcohol or soapy water.
Dry the blade completely before sharpening.
Always clean the blade before sharpening to remove dirt and sap buildup.
Step 3: Choose the Right Sharpening Tool
Option 1: Honing Stone (For Light Sharpening)
Hold the stone at a 25–30-degree angle to match the blade’s bevel.
Use light, even strokes in one direction (never back and forth).
Apply 5–10 strokes per section, depending on dullness.
Option 2: Diamond File (For Dull or Nicked Blades)
Position the file against the cutting edge at the correct angle.
Use smooth, consistent strokes, working from base to tip.
Finish with a honing stone for a razor-sharp edge.
Use a honing stone for fine sharpening and a diamond file for restoring dull or damaged blades.
Step 4: Test the Sharpness
A properly sharpened pruner should slice through a twig effortlessly.
Try cutting a thin branch—if it glides through cleanly, it’s sharp enough.
If it still drags or tears, repeat the sharpening process.
Pro Tip: A sharp pruner = effortless cutting and healthier trees.
Step 5: Apply Lubricating Oil
A dry blade rusts faster and dulls quicker. Protect it with oil.
Wipe off metal shavings with a clean cloth.
Apply a thin coat of lubricating oil to prevent rust.
Store the pruner in a dry place when not in use.
Always oil the blade after sharpening to prevent rust and keep it cutting smoothly.
Common Mistakes to Avoid When Sharpening a Pole Tree Pruner Blade
Skipping the cleaning step – Dirt and sap clog the file, making sharpening harder.
Sharpening at the wrong angle – Follow the factory bevel for the best performance.
Using too much pressure – Pressing too hard removes too much metal, weakening the blade.
Neglecting lubrication – A dry blade rusts and dulls faster.
Avoid dirt buildup, incorrect angles, excessive pressure, and skipping lubrication for a long-lasting, sharp pruner blade.
Final Thoughts: Keep Your Pole Tree Pruner Blade Sharp & Efficient
Dull pruners make cutting a struggle—I used to force my way through branches, thinking I needed more strength. Turns out, I just needed a sharp blade.
By sharpening regularly with a honing stone or diamond file, and oiling after every session, you can keep your pole tree pruner in top shape. A sharp pruner makes cutting smooth, easy, and tree-friendly.
Now that you know how to sharpen a pole tree pruner blade, let’s go over the biggest sharpening mistakes people make—and how to avoid them.
Common Mistakes to Avoid When Sharpening a Pole Saw Blade
Sharpening a pole saw blade seems simple—until you do it wrong. Trust me, I’ve made every mistake in the book. From filing at the wrong angle to skipping the oiling step, I’ve learned the hard way. A dull or unevenly sharpened blade makes cutting twice as hard, so let’s go over the most common mistakes and how to avoid them.
Mistake #1: Sharpening at the Wrong Angle
Your saw blade was designed with a specific cutting angle—mess that up, and it won’t cut properly. When I first sharpened my pole saw, I guessed the angle (big mistake!) and ended up with a blade that barely cut at all.
Most pole saw blades sharpen at a 30–35-degree angle—match the original bevel of the teeth.
For chainsaw-style pole saws, use the manufacturer’s recommended round file size and guide.
If unsure, compare with a new blade or check the user manual.
Sharpen at the correct angle (usually 30–35 degrees) for clean, efficient cuts.
Mistake #2: Not Securing the Blade Properly
Ever tried sharpening a moving blade? I did once, and let’s just say my results were… awful. If the blade isn’t stable, your strokes will be uneven, and you’ll struggle to get a sharp edge.
Use a vice grip or clamp to hold the blade in place.
If the blade is detachable, remove it before sharpening—it’s much easier.
For pole saw chains, engage the chain brake and use a guide bar clamp.
Always secure the blade before sharpening to ensure even, controlled strokes.
Mistake #3: Using Too Much Force While Filing
I used to think pressing harder = faster sharpening. Wrong! Too much pressure grinds down the teeth too quickly, shortening the blade’s life. Worse, it creates an uneven edge that makes cutting rough and inefficient.
Use light, even strokes in one direction (never back and forth).
5–10 strokes per tooth is usually enough—don’t overdo it.
For chainsaw-style pole saws, maintain a consistent number of strokes per cutter for even sharpness.
Use gentle, even strokes—too much pressure wears down the blade too fast.
Mistake #4: Filing Back and Forth (Instead of One Direction)
One of my biggest beginner mistakes? Sawing the file back and forth. This might seem like it speeds things up, but it actually grinds down the teeth unevenly and makes the saw less effective.
Always file in one direction—forward strokes only.
Match the factory bevel and use consistent pressure.
Mark the first tooth you sharpen with a marker to track your progress.
File in one direction (not back and forth) to keep the teeth evenly sharp.
Mistake #5: Skipping the Depth Gauges on Chainsaw-Style Pole Saws
If you’re sharpening a chainsaw-style pole saw, you can’t ignore the depth gauges (rakers). These tiny guides control how deep the teeth bite into the wood. If they’re too high, the saw won’t cut effectively.
Use a depth gauge tool to check the raker height.
File them down slightly if needed—but don’t go overboard.
Test the saw after sharpening—if it struggles, the rakers might need adjustment.
Check and adjust depth gauges on chain-style pole saws to maintain proper cutting depth.
Mistake #6: Forgetting to Clean the Blade Before Sharpening
Sharpening a dirty, sap-covered blade is a waste of time. Dirt and sap clog the file, making sharpening less effective and frustrating.
Use a brush or cloth to wipe off sawdust and sap.
If needed, scrub with warm soapy water or rubbing alcohol.
Dry the blade completely before sharpening.
Clean the blade before sharpening to remove sap and dirt buildup.
Mistake #7: Not Oiling the Blade After Sharpening
I once spent an hour sharpening my pole saw only to find rust on it the next week. Why? I forgot to oil it. A sharp blade needs protection to stay in top shape.
After sharpening, wipe the blade clean to remove filings.
Apply a thin layer of lubricating oil to prevent rust.
Store the pole saw in a dry place—moisture speeds up rusting.
Always oil the blade after sharpening to prevent rust and keep it cutting smoothly.
this video owner name : Backyard Mike
How to Maintain a Pole Saw Blade After Sharpening (Keep It Sharp Longer!)
You’ve just sharpened your pole saw blade, and it’s cutting like new—don’t let all that effort go to waste! A sharp blade won’t stay sharp forever if you don’t take care of it. I’ve learned this the hard way—after spending time sharpening, I’d leave my saw in a damp garage, and guess what? Rust and dull edges greeted me the next time I needed it.
Want to keep your blade razor-sharp longer? Follow these simple maintenance tips to save time, effort, and frustration.
1. Clean the Blade After Every Use
Dirt, sap, and sawdust stick to the blade like glue after cutting. If you leave it on, it hardens, dulls the edge, and even attracts rust. Trust me, cleaning your blade takes less than a minute but makes a huge difference.
Wipe down the blade with a dry cloth after each use.
For sticky sap, use a bit of rubbing alcohol or warm, soapy water.
Dry the blade completely before storing it.
Always clean your pole saw blade after use to remove dirt, sap, and sawdust, preventing buildup and rust.
2. Oil the Blade to Prevent Rust
I once left my pole saw in the shed for a month without oiling it—when I pulled it out, it had a thin layer of rust. A simple oiling routine would have saved me from scrubbing and resharpening.
After cleaning, apply a thin coat of lubricating oil to the blade.
Use a cloth or brush to spread the oil evenly.
For chainsaw-style pole saws, use bar and chain oil for smoother performance.
Oiling your pole saw blade after sharpening prevents rust and keeps it cutting smoothly.
3. Store Your Pole Saw in a Dry Place
Moisture is the enemy of a sharp blade. Even a little humidity can cause rust. I used to store my saw in the garage, near a window—big mistake. The temperature changes caused condensation, and my blade dulled faster than expected.
Store your pole saw in a dry place, away from moisture.
If possible, hang it up instead of placing it on a damp surface.
For extra protection, wrap the blade in a dry cloth or use a blade cover.
Store your pole saw in a dry area, away from moisture, to prevent rust and blade dulling.
4. Sharpen Regularly (A Little Maintenance Goes a Long Way!)
Waiting until your blade is completely dull is like waiting until your car breaks down before changing the oil—it makes everything harder! A light touch-up every few uses keeps the blade in peak condition.
For manual pole saw blades, do a quick sharpening every 3–5 uses.
For chainsaw-style pole saws, touch up the chain after heavy use.
If the blade struggles or leaves rough cuts, it’s time to sharpen.
Regular touch-up sharpening keeps your pole saw blade cutting efficiently and extends its lifespan.
5. Avoid Cutting into Dirt, Rocks, or Hard Knots
Want to dull your blade instantly? Hit a rock or a thick tree knot! I once tried cutting too close to the ground and ended up filing down nicks and dents for 30 minutes.
Avoid sawing too close to the ground where rocks or dirt can damage the blade.
If you hit a knot, slow down and let the blade do the work.
Use the right blade for the job—some pole saws are better suited for thick, knotty wood.
Avoid cutting into dirt, rocks, or knots to prevent unnecessary blade dulling and damage.
Final Thoughts: Keep Your Blade Sharp with Simple Habits
A little maintenance goes a long way when it comes to keeping your pole saw blade sharp. Clean it, oil it, store it properly, and touch up the edge regularly. These habits take minutes but save hours of sharpening and frustration later.
Now that you know how to keep your blade in top shape, you’ll always be ready for a smooth, effortless cut.
Want to make your pole saw last even longer? Check out my pro tips on proper pole saw handling and maintenance!
Conclusion: How to Sharpen a Pole Saw Blade
A sharp pole saw makes all the difference—it turns a frustrating, time-consuming job into a smooth, effortless experience. I’ve learned the hard way that waiting until the blade is completely dull only makes cutting harder (and sharpening takes longer). The best approach? Regular maintenance and sharpening before it gets too dull.
Think of it like this: Would you rather spend a few minutes maintaining your saw or struggle for hours hacking through branches? Keeping your pole saw sharp saves time, effort, and frustration—it’s the secret to clean, precise cuts every time.
Use the right sharpening method for your blade type.
Maintain a proper angle while filing to avoid uneven edges.
Keep your blade clean, oiled, and stored properly to extend its lifespan.
Sharpen little and often—it’s easier to maintain sharpness than fix a dull edge.
Now, it’s your turn! What’s your go-to sharpening method? Have you ever struggled with a dull pole saw? Drop a comment below and let’s talk sharpening tips!


Leave a Reply